As an equine veterinarian, I rely on many resources to keep the horses in my practice healthy. From the drugs on my truck to consultations with my colleagues, I draw from a variety of assets to provide the best possible care. Among those assets are my clients, the horse owners.
A well-informed owner who is capable and confident doing a few basic horse health-care tasks is an incredibly valuable partner to a veterinarian. Of course, we don’t expect our clients to be able to diagnose illnesses or perform any complex treatments—in fact, trying to do so can backfire and make a situation worse. But under the guidance of a professional, an owner with fundamental horse-care skills can play a key role in a sick or injured horse’s recovery.
If you’ve owned horses for any length of time, you’ve probably done most, if not all, of these procedures. And chances are you’re pretty good at them. Most are fairly straightforward, but it’s still a good idea to refresh your skills from time to time. In the same way that the best veterinarians continue their educations throughout their careers, the best owners take advantage of every opportunity to improve and expand their horse-care repertoire.
The most important skills fall into one of two categories: Gathering vital information about a horse’s condition prior to the veterinarian’s arrival, and aiding in the continuation of treatment after the veterinarian leaves. Here’s a quick look at seven techniques you’ll want to know how to do, along with my suggestions for how you can do them most effectively and efficiently.
Vital Information
1. Taking Temperature
A horse’s temperature provides incredibly valuable information to a veterinarian. An increase from the normal temperature of 99 to 101 degrees Fahrenheit, for instance, can indicate any number of serious conditions, And the sooner I am aware of the situation, the better.
For example, if we get a call about a horse with loose manure and the owner can tell us that he also has a temperature of 103, I’m going to change my schedule to head out to the farm as soon as possible. A high fever suggests that the horse may have a serious illness. On the other hand, a horse with loose manure and no fever may simply be adjusting to new pasture growth. I’m still going to head out to the farm to do a full workup, but I’m not going to bump other appointments to do so.
Taking a horse’s temperature isn’t difficult. For ease, efficiency and safety, I suggest using a digital rather than a mercury thermometer, but if you prefer, an old-fashioned glass one will work. Attach the clip or string to the horse’s tail to ensure easy retrieval, then carefully insert the thermometer into the horse’s rectum. Keep the horse quiet and leave the thermometer in place long enough to get a reading: This will take at least three minutes for the glass thermometer; the digital unit will beep when the temperature has been taken. You can find digital thermometers made specially for horses, but simple, inexpensive ones made for human use will work, too—however, these don’t have a string for retrieval, so hold on to them when taking a temperature.
Keeping a few things in mind when taking a horse’s temperature will make the reading more meaningful. First, take it before you give the horse any medications. Non-steroidal anti-inflammatory medications are fever reducers. If you medicate your horse, then take his tem-perature, you will not get a useful reading. Ambient conditions will affect a horse’s temperature, too. After a workout in the summer, it will naturally be elevated.
If you’re concerned about a high reading in that situation, hose the horse off with cool water, scrape him well and stand him in the shade for 20 minutes. His body temperature should drop considerably. If it doesn’t, that’s one more important detail to relay to
your veterinarian.
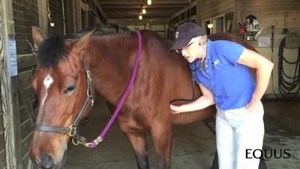
2. Monitoring heart rate
I don’t often ask an owner for a horse’s heart rate when they call me, but I’m thrilled if it’s offered. A normal heart rate of a horse at rest is 30 to 40 beats per minutes. An elevated resting rate can be an indication of pain. That makes heart rate information especially useful when you are calling your veterinarian about a suspected colic. It may be difficult to tell for sure whether a stoic horse is in pain, but vital signs don’t lie, and if his heart rate is elevated, he needs to be seen quickly.
Heart rate is the equivalent of pulse rate, but feeling a horse’s pulse can be a little tricky. On horses, you can find a pulse down by the fetlocks or underneath the jawbone. Personally, I think under the jawbone is the optimal location; pulses down on the legs can be influenced by many things—such as the horse standing in cold conditions—while the pulse up by the jaw tends to remain stable.
To take your horse’s pulse, stand facing his head and feel along the inside of one side of his jawbone, approximately where the throatlatch of a halter would lie. You can use either hand and check on either side. Place your thumb against the outside of his face to steady your hand and “roll” your four fingers along the inside of his jawbone feeling for a very flexible, tube-like structure. That’s the salivary duct, and once you’ve found it you can typically feel the pulse at the same location by easing up on the pressure a bit. A horse’s pulse is slower than a person’s and can be difficult to feel, but if you are patient you can develop a knack for taking it. To calculate heart rate just count the number of beats for 15 seconds then multiply by four.
Another option is to listen directly to your horse’s heartbeats using a no-frills stethoscope that can be purchased for less than $15 at a drug store. Simply grip the head of the stethoscope, keeping your fingers clear of the sensitive diaphragm on the front of the instrument. Then press the head firmly into the horse’s “armpit,” just above and behind his elbow where the girth lies. You may need to experiment a bit, but eventually you’ll find the location where you can hear the heart clearly and begin counting beats.
Keep in mind the obvious (which is easy to overlook if you’re worried): A horse who has been recently active will have an elevated heart rate, but it should decrease quickly when he rests, returning to normal within 20 minutes.
3. Determining respiratory rate
Another helpful vital sign is respiratory rate. Usually, you can see the rib cage expand with each inhalation by standing at a horse’s head and looking down the length of his flank—focus on the area just behind where your leg rests when riding English or where a rear cinch lies in Western tack.
Watch your horse breathe. Count the breaths. Seems easy, right? Not necessarily. The tricky part is making sure your horse is standing quietly. Horses use their sense of smell to understand what is going on around them, and as they sniff, their breathing patterns are disrupted. The same is true if a horse is snuffling for treats. Likewise, if you are trying to monitor the respiratory rate of a horse and another down the aisle whinnies loudly, you’ll probably have to start all over.
Respiratory rates are similar in horses, no matter what their size. The normal range is from eight to 20 breaths per minute. Obviously, a horse who has just worked will be breathing harder, but that rate should return to normal within 20 minutes
of stopping. A horse at rest who is breathing heavily may be “blowing off” a fever as part of his temperature regulatory system, or he may have recurrent airway obstruction (“heaves”). In either case, that’s important information to share with your veterinarian.
4. Checking mucous membranes
The color of your horse’s gums, along with how long they take to refill when “blanched,” can reveal a number of conditions, from dehydration to shock to certain toxic conditions. This makes it a terrific tool for horse owners to use when gathering information to relay to veterinarians. The trick is you can’t wait until there’s a problem to investigate; to accurately interpret what you are seeing, you really need to know what “normal” is for your horse.
A horse’s gums range in color from a salmony pink to a very pale, peachy pink. When circulation is compromised, the color washes out dramatically. A very sick horse will have nearly white gums or visible blood vessels on a grayish background. Brick-red gums can be a sign of dehydration, endotoxemia0 or plant poisoning. Checking gum color is easy; just pull up your horse’s upper lip and take a good look.
While you’re focused on the area, you can also do a “capillary refill” check. This involves pressing your thumb against the horse’s gums just above a tooth until the area goes white under the pressure (one or two seconds is enough). Then remove your thumb and count how many seconds it takes for color to return. In a healthy horse, that will happen very rapidly—almost too fast for you to count seconds. If it seems slow, that’s important information to relay to your veterinarian.
Continued treatments
After a veterinarian has made a diagnosis, initiated treatment and headed down the farm driveway, you can step up to become an integral part of your horse’s recovery. Horse owners can contribute to or even entirely take over many aspects of treatment and supportive care. Not only will this save you a considerable amount of money by reducing the number of follow-up calls or even the need for hospitalization, but it means the horse won’t have to wait to be seen by a veterinarian to catch developing problems. Here are a few fundamental skills an owner can easily acquire to aid a horse’s recovery.
5. Administering oral medications
It’s an unusual equine recovery that doesn’t require some form of oral medication, given daily or even several times a day. Reliable administration of antibiotics or nonsteroidal anti-inflammatories is crucial to swift and complete recovery. The good news is that if you’ve ever tried to medicate a reluctant toddler or an angry cat, getting pills into a 1,200-pound horse will be surprisingly simple in comparison. All you need is the right tools and technique.
Start by crushing the medications. An old-fashioned mortar and pestle works well, as does a plastic “pill crusher” bought specifically for the purpose. Coffee grinders are popular, too—just make sure it’s never, ever used again for coffee. Mix the ground medication with a small amount of a delivery substance, preferably applesauce or yogurt. Water is convenient but doesn’t always work well for this job because it’s easy for the horse to spit out and doesn’t always “carry” the crushed medications well. Whatever you use, make sure your final concoction fills no more than a shot glass or tiny paper cup. Then, suck all the contents into a catheter-tip syringe. You can also reuse the syringe from a paste
dewormer if you’ve cleaned it thoroughly.
With the loaded syringe in your hand, stand facing your horse holding the noseband of his halter, near a side ring, in your other hand. Then, carefully slide the thumb of your “holding” hand into the side of his mouth at the bars. As he opens his mouth, quickly slip the tip of the syringe into his mouth and squirt its contents back up and over his tongue. (A rookie mistake it to angle the syringe so it squirts out the other side of the mouth onto the stall wall.) Hold on to the noseband for a second or two if you need to follow his head as you empty the syringe, but let go as soon as you can. Your horse will probably drop his head and chew, but with the right mix-in and technique, he won’t be able to spit out the medication.
6. Applying medication to eyes
Your horse’s eyes are pretty needy when it comes to medication. Most ointments or drops need to be applied three, four or even five times a day to be effective. And the process isn’t always pleasant for either horse or human.
Many owners opt to hospitalize a horse for the duration of intensive ocular treatments, effectively outsourcing the hassle. Another solution is a “drip” system, which involves administering medication via tubing sewn through the eyelids and attached to the crest. But it’s very useful to know how to medicate an eye, although it takes time to learn the techniques, and your horse will have to be cooperative.
A couple of methods can be used to apply ointment to a horse’s eye. Here’s a simple one: Stand next to the horse facing the eye that needs to be medicated. Hold the ointment tube in one hand and slip the other underneath the halter (make sure it’s adjusted loosely enough to allow your hand to slip out if the horse flings his head). Place the index finger of that same hand in the crease of the horse’s upper lid, so the fold of skin rests on your fingernail. Place your thumb below his lower lashes. Press inward very slightly and pull the eyelids apart, which will create a “trough” on the lower lid where you can squeeze the prescribed amount of ointment. Alternatively, place the ointment on your clean fingertip and swipe it into the trough formed by the lower lid.
You can modify this technique in a variety of ways, but the reality is that it may be a two-person job to administer eye medication and sometimes a horse just won’t cooperate. In those instances, it’s wise to go with hospitalization or a drip system. Yes, it’s an extra expense, but the cost could otherwise be a painful, useless or lost eye.
7. Changing bandages
If your horse has sustained an open wound, you may find yourself in charge of bandage changes for the coming days or even weeks. This is a crucial task not only to keep the wound clean, but to assess healing and to spot signs that further veterinary intervention may be required. Bandage changes are an important job, for sure, but they are not as complex or fraught with peril as you may have been led to believe.
Your veterinarian will let you know if you need any special supplies or techniques for your horse’s specific situation, but usually regular “quilts” and cotton wraps are fine for wound bandages. Fleecy polo wraps tend to stretch too much to securely hold wound dressings, so they aren’t the best tool for the job. Self-adhesive veterinary wrap is convenient but many brands shrink when wet. That’s no problem for a stall-kept horse but could be for one turned out with a bandage on.
The wound itself is likely to have a nonstick gauze pad over it, held in place with rolled gauze. Remove both at each bandage change and take a close look at the wound. An unusual drainage, unpleasant smell or anything else suspicious warrants a call to your veterinarian. If you’re unsure of what you’re seeing, take a picture and e-mail or text it to your veterinarian. Your vigilance may catch an infection or proud flesh formation at a stage when it’s still easy to address. Many people worry about the actual application of the bandage, but wound assessment is really the critical part of the process.
Clean and medicate the wound according to the instructions left by your veterinarian, then cover it again with a fresh nonstick pad and rolled gauze. Over that, apply the quilt, making sure it’s smooth with no wrinkles or bunches against the skin. Then, beginning in the center of the quilt, wrap the cotton bandage around the leg.
You’ll hear a lot of proclamations about the “correct” direction to wrap, but in all honesty, when you are applying a well-padded wrap over a wound, it doesn’t make much difference. You won’t be pulling anything tightly enough to damage a tendon, and if you are, the direction you’ve wrapped isn’t the problem.
Wrap down the leg and back up to cover the quilt, with enough pressure to hold the bandage in place but not squeeze or bind the leg. Consider how you’d like your helmet to fit—snugly, but not tight. Secure the wrap with a bandage tape or small piece of duct tape.
Equine veterinarians are lucky in that our clients are usually eager to become actively involved in their horse’s care. When directed toward the right veterinary follow-up tasks, that desire can make a huge difference in the speed and completeness of a horse’s recovery.
This article first appeared in EQUUS issue #455.
To read about the benefits of equine wellness exams, click here. To learn about a new sensor system that can help track equine well-being, click here.